
Winter-Ready: Getting Your Horse Shelter and Livestock Sheds Prepared Before the First Storm

Every livestock owner knows the feeling. The first real cold front of the season shows up earlier than expected, and suddenly you’re out in the dark with a flashlight, stapling plastic over a drafty wall while the wind tries to rip it out of your hands.
It doesn’t have to go that way. A well-maintained animal shelter is one of those structures that mostly takes care of itself, but only if you give it a few hours of attention before winter arrives, not during the first storm. Whether you’re running horses on a few acres or keeping a small mixed herd on a hobby farm, a weekend of preparation in the fall saves weeks of scrambling in the cold.
Here’s a practical checklist, gathered from the habits of experienced horse and livestock owners, for getting your shelters winter-ready.
Start With a Structural Walk-Around
Before anything else, put eyes on the building itself. Winter is hard on structures, and small problems become big ones under snow load and freezing rain.
Check the roof first. Look for loose panels, missing fasteners, lifted edges, or rusted spots that could leak. If you have an older shed, pay attention to the rafters and support posts. A roof that was fine in July can sag under two feet of wet snow, and horses standing beneath it don’t have the option to move if you’re not there when it happens.
Walk the walls next. Look for gaps at the seams, rot at the base of wooden posts, and any fasteners that have backed out. Horses and cattle are hard on buildings. They rub, lean, kick, and chew, and the damage they do over a summer often goes unnoticed until a winter wind finds every weak spot.
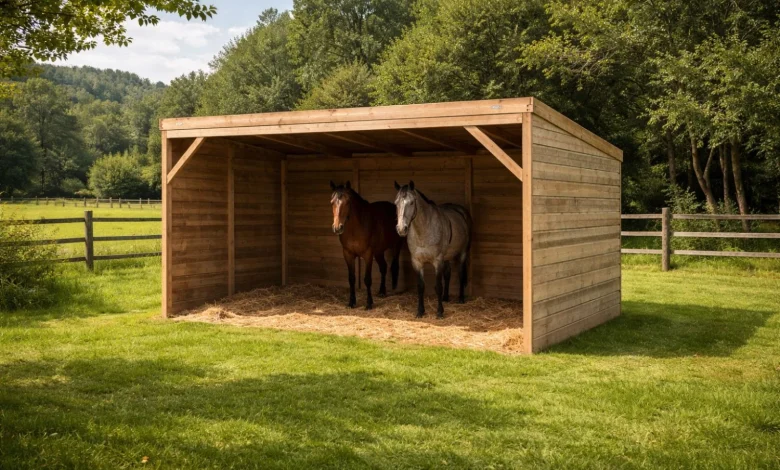
Finally, check the open front of a run-in shed. The whole design depends on that opening staying clear and functional. Make sure gates still swing, panels haven’t shifted, and nothing is stacked in the entrance that would block an animal trying to get inside quickly.
Close the Gaps, But Don’t Seal It Up Too Tight
Here’s where a lot of well-meaning owners go wrong. The instinct in fall is to seal every crack and make the shelter as airtight as possible. That’s actually a mistake, and with horses it can be a dangerous one.
Livestock generate a lot of moisture through breath and sweat, and a sealed-up shelter traps it. Condensation forms on the inside of the roof, drips down, and creates a damp environment that’s worse for respiratory health than cold air ever is. Good barn managers repeat a phrase worth remembering: horses tolerate cold far better than they tolerate damp and stuffy.
The goal is draft-free at animal level, not airtight. Close gaps in the lower third of the walls where wind hits animals directly, especially on the side facing prevailing winter weather. Leave ventilation high, near the roofline, so moisture can escape. If your run-in shed has a back wall with a gap along the top, that’s a feature, not a flaw.
Face the Weather, Literally
If you’re still deciding where a shelter goes, or if you have a portable one you can reposition, orientation matters more than most people realize. The open side should face away from the prevailing winter wind, usually south or southeast in much of the country, so animals get sun in the opening and shelter at their backs.
If your shed is permanent and the opening faces the wrong way, you don’t have to live with it. A simple windbreak, a solid panel wall, a stack of round bales, or even a line of evergreen trees planted years ago can redirect the worst of the wind. Round bales placed along the windward side are a classic fix on cattle operations because they do double duty as emergency feed.
Solve the Mud Problem Before It Starts
Mud is the enemy of winter livestock care. It forms where animals congregate, right at the shelter entrance, and once it’s there it stays until spring. Mud contributes to hoof problems, thrush, abscesses, and lost shoes, and it makes every chore miserable.
The fix happens before the ground freezes. If the area in front of your shed already collects water, consider adding a pad of crushed gravel over geotextile fabric, which stabilizes the ground and lets water drain instead of pooling. Even a few loads of gravel spread at the entrance and along the fence line where animals stand to eat makes a noticeable difference.
Gutters are the other underrated tool. A shed roof dumps an enormous amount of water right at the entrance edge. A gutter with a downspout that carries water away from the pad, even a simple one, keeps that water from turning the whole area into a bog during January thaws.
Water: The Winter Chore That Rules Them All
Animals can’t meet their water needs by eating snow, no matter how often people wish they could. Dehydration in winter is a real and underappreciated risk, and it contributes directly to impaction colic in horses, one of the most common winter emergencies.
Before the first freeze, check your water setup. Insulate what you can. If you use stock tanks, plan your heating approach now: tank de-icers, heated buckets, or a heated water trough, and check that your outdoor outlets are GFCI protected and in good shape. Extension cords run across a paddock are a hazard, so if you need power at the tank, do the safer wiring before the ground gets hard.
Also plan for the failure case. Every experienced winter keeper has a system for breaking ice by hand when the power goes out, usually a rubber mallet and a plan to water at set times of day.
Feed and Bedding: Stock Up and Store Smart
Two things run short in winter: hay and bedding. And both get expensive and hard to find in the middle of the season.
Hay needs go up in cold weather because animals burn more calories staying warm. A common guideline is increasing forage by roughly one percent of body weight for every degree below a critical temperature, but the practical version is simpler: watch body condition and be ready to feed more. Buy early, buy extra, and store it away from the shelter. Hay stacked inside a horse shelter is a fire risk, a mold risk, and an invitation to rodents.
For bedding, the goal in a run-in or loafing shed is a deep, dry pack. Many owners use straw or wood shavings and let the lower layers compost, which actually generates a small amount of warmth. The key is keeping the top layer dry. Strip and replace wet spots rather than topping endlessly, because a wet bed in freezing weather becomes an ice bed.
Handle the Small Stuff That Becomes Big Stuff
A few final items that experienced owners check every fall:
- Fasteners and latches. Cold fingers and frozen gates turn a sticky latch into a ten-minute fight. Oil hinges and replace anything bent now.
- Lighting. Short days mean chores happen in the dark. Check the shelter’s light, or plan a good headlamp, because carrying water by headlamp is a skill every northern livestock owner eventually masters.
- Rodent control. Mice and rats move into feed storage when it gets cold. Secure your feed in metal bins before they find it.
- First aid and supplies. Winter is when colic, slips, and injuries happen. Restock the kit, and make sure you have a plan for getting a vet to your property if the driveway ices over.
- Fence lines. Walk them before the ground freezes. A loose wire that’s a nuisance in October is a hazard in January.
The Bottom Line
Winter readiness isn’t about expensive equipment or major construction. It’s about a few deliberate hours in the fall: closing the right gaps, opening the right ventilation, moving water away from the entrance, and stocking what you’ll need before everyone else is looking for it.
The owners who seem calm all winter aren’t lucky. They just did this work while the weather was still pleasant. Do the same, and the first storm of the season becomes something you watch from the window with a cup of coffee, instead of something you fight with a staple gun in the dark.