

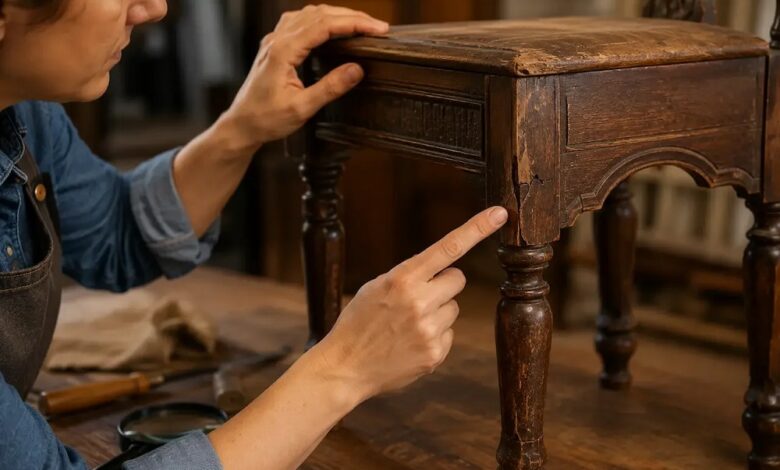
Vintage and antique wooden furniture carries a level of craftsmanship rarely found in modern, mass-produced items. Dovetail joinery, solid hardwood cores, hand-carved details, and rich historical character make these pieces well worth saving. Over decades, however, exposure to sunlight, fluctuating humidity, accidental spills, and accumulated layers of grime can leave heirloom furnishings looking tired, cloudy, or structurally compromised.
Restoring old furniture to its original luster requires patience, the proper methodology, and respect for the underlying materials. A rushed DIY approach with power sanders or harsh multi-purpose cleaners can permanently ruin delicate veneers and erase historical patina. By approaching each restoration through methodical assessment, careful surface preparation, structural mending, and skilled finishing, you can achieve museum-quality results right inside a home workshop.
Initial Assessment: Conservation Versus Full Refinishing
Before purchasing stripping solvents or reaching for coarse sandpaper, every restorer must evaluate the historical and physical state of the piece. The first rule of professional restoration is to preserve as much original material as possible.
Begin by determining whether the piece requires a gentle deep clean, a finish rejuvenation, or a complete teardown and refinish. A full refinish involves removing the existing finish down to raw wood, which fundamentally alters the piece and can destroy the resale value of rare antiques. If an antique features its original eighteenth or nineteenth-century shellac, preserving the crazed alligator texture and amber glow is often preferred over stripping.
Examine the construction to identify the materials:
-
Solid Hardwood: Oak, walnut, cherry, maple, and mahogany are forgiving materials that can withstand light mechanical sanding and chemical stripping without risk of breakthrough.
-
Wood Veneer: Many elegant pieces feature thin sheets of figured wood glued over a secondary wood base. Sanding aggressively through a veneer layer exposes the substrate beneath, causing irreparable visual damage.
-
Joinery Style: Mortise-and-tenon joints, wooden dowels, and hand-cut dovetails indicate age and quality, whereas staples, pocket screws, and particleboard point to modern mass-market origin.
-
Hardware and Maker Marks: Inspect the underside of drawers, back panels, and interior drawer sides for paper labels, burned stamps, or brass badges that identify the craftsman or factory.
Setting Up a Safe and Functional Workshop
Working with aged finishes, caustic chemicals, fine timber dust, and solvent-based topcoats demands a well-ventilated, secure environment. Professionals never undertake heavy chemical work in confined living areas.
Set up your project space in an open garage, covered outdoor patio, or a dedicated workshop equipped with cross-ventilation fans. Lay down heavy canvas drop cloths rather than lightweight plastic sheeting, as plastic becomes slippery when wet and easily tears under chair legs.
Personal safety gear is mandatory throughout the process:
-
Respirator: A half-face respirator equipped with organic vapor cartridges protects your lungs from volatile organic compounds during stripping and finishing, while high-efficiency particulate air filters shield against wood dust during sanding.
-
Eye Protection: Chemical splash goggles shield against accidental chemical splatters when neutralizing strippers.
-
Gloves: Heavy-duty chemical-resistant nitrile or neoprene gloves prevent chemical burns on hands and forearms. Standard disposable latex gloves quickly melt when exposed to lacquer thinners and solvents.
Deep Surface Cleaning and Decontamination
Decades of dust, kitchen grease, cigarette smoke, and silicone-based furniture polishes create a murky residue that masks the genuine color of the wood. Jumping directly to stripping without thorough cleaning drives surface wax and dirt deeper into open wood pores.
Mix warm water with a few drops of mild dish detergent. Dip a soft lint-free cotton cloth into the solution, wring it out until damp, and gently wipe the entire piece in small circular motions. Immediately follow with a dry microfiber cloth to prevent water pooling.
For stubborn wax accumulation or sticky residue, wipe the timber down using mineral spirits applied with super-fine grade double-zero steel wool or an abrasive non-woven synthetic pad. Always rub strictly in the direction of the wood grain. Mineral spirits effectively dissolve hardened oils, grease, and paraffin wax without lifting the underlying finish or swelling wood fibers. Once clean, allow the piece to dry completely for twenty-four hours before deciding on further interventions.
Removing Failing Finishes: Chemical Stripping Techniques
When an old finish has become tacky, severely flaking, deeply water-damaged, or blackened beyond revival, full removal becomes unavoidable. Chemical stripping is vastly superior to power sanding for this stage because it preserves the crisp edges of moldings, prevents swirl marks, and preserves the veneer thickness.
Apply a generous, uniform layer of a paste or semi-paste chemical stripper using a natural bristle brush. Brush in a single direction without over-working the product. Allow the chemical to rest undisturbed on the surface for fifteen to thirty minutes, giving the active solvents time to penetrate, soften, and bubble the old layers of lacquer, varnish, or paint.
Once the finish looks blistered, remove the sludge using a plastic putty knife or a round-edged brass scraper. Avoid using sharp-edged steel putty knives, which easily gouge soft, solvent-softened timber. For turned table legs, routed details, and carved fluting, use coarse bronze wool, brass detail wire brushes, or pointed hardwood dowels wrapped in rags to pull the finish out of tight crevices.
Neutralize the surface immediately according to the stripper manufacturer specifications, typically with denatured alcohol, mineral spirits, or clean water. Wipe the wood repeatedly until no sticky residue remains, and permit the bare wood to dry fully for at least twenty-four to forty-eight hours.
Structural Stabilization and Timber Repairs
A piece of furniture must be functionally sound before applying visual finishes. Loose joints, detached veneer blisters, and deep gouges should be addressed while the wood is bare.
Wobbly chairs and desks generally suffer from failed hide glue inside mortise-and-tenon joints. Carefully disassemble loose joints by gently tapping them apart with a rubber mallet. Scrape away all crystalline, brittle old glue from the mortises and tenons using a narrow chisel, as fresh adhesive will not bond to dried historical glue. Apply modern polyvinyl acetate wood glue or traditional liquid hide glue, assemble the joint, and secure it with parallel bar clamps. Wipe away any glue squeeze-out with a damp sponge immediately; dried glue seals wood pores and blocks subsequent stains from penetrating.
For lifted or bubbling veneer:
-
Carefully slit the raised bubble along the wood grain using an exacto knife.
-
Use a thin glue syringe or razor blade to insert a small amount of wood glue under the veneer sheet.
-
Press the blister flat to disperse the adhesive evenly across the substrate.
-
Cover the repair with wax paper, place a flat wooden caul block over the top, and apply clamp pressure for twelve hours.
Deep gouges and missing wood sections can be built up using two-part epoxy wood fillers or polyester repair putty. Once fully cured, carve and sand the filler flush with the surrounding surface. For minor nail holes or shallow dents, run a hot household steam iron over a damp cotton rag placed directly on the impression; the rising steam swells collapsed wood fibers back to their original height.
Sanding for a Flawless Surface Foundation
Sanding is not an aggressive tool for removing wood; it is a refined method for creating an even, uniform surface tension that accepts stains and clear coats symmetrically.
Always sand exclusively by hand or with a low-vibration random orbital sander running at medium speed, keeping the sanding pad flat at all times. Progressive grit sequencing is vital. Starting with an excessively fine paper polishes the wood and closes pores, while skipping grit levels leaves visible scratches:
-
120-Grit Sandpaper: Use sparingly to level filled spots or remove remaining surface fuzz on stubborn bare hardwoods.
-
150-Grit Sandpaper: Smooths out initial coarse sanding marks and prepares the grain.
-
180-Grit Sandpaper: The standard baseline grit for opening pores to receive stain evenly.
-
220-Grit Sandpaper: The ultimate finishing pass for domestic hardwoods. Going beyond 220-grit on bare wood is counterproductive, as it polishes the timber and inhibits stain absorption.
After concluding your final sanding run, blow away dust with compressed air and wipe the entire piece down with a lint-free tack cloth. To preview the natural color of the wood and reveal any lingering cross-grain scratch marks or glue spots, wipe the piece with denatured alcohol. The alcohol evaporates cleanly within minutes without raising the grain.
Staining and Enhancing Natural Wood Grain
Staining is optional; many hardwoods like black walnut, Honduran mahogany, and white oak look stunning under a clear finish alone. However, if color leveling, sun-fade correction, or era-appropriate shading is required, select your stain medium based on the wood species.
Softwoods like pine, poplar, and birch tend to absorb stains erratically, leading to blotchy, uneven patches. Apply a liberal coat of pre-stain wood conditioner before staining to regulate pore porosity.
Oil-based pigment stains offer generous working time, making them straightforward to apply across expansive dining tabletops. Wipe the stain on using a clean rag, let it rest for five to ten minutes, and firmly wipe away all excess before it turns tacky.
For dense, tight-grained hardwoods, solvent-based dye stains penetrate deeper than surface pigments, providing dramatic grain clarity without muddying the visual depth of the wood figure. Always allow stains to dry thoroughly according to manufacturer guidelines before sealing.
Selecting and Applying a Professional Topcoat
The topcoat protects the wood from water damage, ultraviolet radiation, and everyday abrasion while providing visual luster. Professionals select their clear finishes based on durability requirements and period accuracy.
-
Danish Oil and Tung Oil: Penetrating oils soak into the timber cells rather than forming a hard surface film. They provide a low-luster, close-to-the-wood look that feels organic to the touch. They offer moderate moisture defense and are easily spot-repaired, making them popular for mid-century modern furniture.
-
Shellac: A traditional finish favored for pre-twentieth-century antiques. Applied with a French polishing pad or high-grade badger hair brush, shellac imparts unmatched amber warmth and visual depth. However, it offers low resistance to alcohol, heat, and moisture.
-
Polyurethane: An exceptionally durable resin finish available in oil-modified and water-borne formulas. It resists scratches, hot liquids, and household chemicals, making it the ideal protective coat for high-traffic dining tables, coffee tables, and desks.
-
Nitrocellulose Lacquer: The historic standard for twentieth-century factory furniture. Fast drying and crystal clear, lacquer builds smooth films rapidly. It dissolves slightly with each subsequent coat, melting previous layers together seamlessly.
When applying wipe-on or brush-on film finishes, apply multiple thin coats rather than one heavy application. Allow each layer to dry completely, lightly scuff-sand with 320 to 400-grit silicon carbide sandpaper to eliminate dust nibs, vacuum the residue, and apply the subsequent layer. Three to four thin coats generally establish an enduring, glass-smooth protective barrier.
Final Buffing and Hardware Restoration
After applying the final protective topcoat, permit the finish to cure fully for at least five to seven days. Although dry to the touch within hours, finishes require several days to reach optimal chemical hardness.
Once fully cured, level out the sheen using paste wax and four-zero super-fine steel wool. Buffing the surface with paste wax cuts down residual brush marks, levels minor dust imperfections, and yields an ultra-smooth satin texture that resists fingerprints.
Do not overlook original metal hardware. Original brass drawer pulls, stamped iron backplates, and hinges frequently carry intricate period detailing beneath oxidized grime. Soak original brass hardware in warm water mixed with mild soap or white vinegar to soften old shellac and dirt. Gently scrub with a soft-bristled toothbrush. Avoid using high-speed mechanical polishing wheels, which round over the crisp manufactured edges and remove original historical plating. Reattach the clean hardware to complete the piece.
Frequently Asked Questions
How can I tell if an old finish is shellac, lacquer, or polyurethane?
You can identify an unknown finish using a basic chemical solvent test conducted in an inconspicuous spot. Dab a cotton swab dipped in denatured alcohol onto the finish; if the surface softens and dissolves within seconds, the finish is shellac. If alcohol has no effect, dab a clean swab saturated with acetone on another test spot. If acetone quickly melts the surface, it is lacquer. If neither solvent softens or dissolves the finish, the piece is protected by a cured modern polyurethane, varnish, or conversion varnish.
Is it possible to eliminate white water rings without stripping the entire tabletop?
White water rings occur when moisture penetrates the clear topcoat and becomes trapped within the finish layers, scattering light. If the underlying wood fibers are undamaged, you can often remove the ring without full refinishing. Place a dry cotton towel over the ring and gently run a household clothes iron on low heat without steam over the fabric for five to ten seconds at a time. The mild dry heat opens the finish pores, allowing the trapped water molecules to evaporate cleanly. Alternatively, gently buff the ring with a paste made of baking soda and non-gel toothpaste using a soft rag.
When should I avoid stripping an old piece of furniture?
Avoid stripping furniture when an item possesses verified historical significance, is a confirmed museum-quality antique, or retains its original, undisturbed finish in stable structural condition. Stripping an early American, Shaker, or eighteenth-century Queen Anne piece can reduce its auction and appraisal value by eighty percent or more. If you suspect an item has significant antique provenance, consult a certified decorative arts appraiser before initiating any abrasive or chemical interventions.
How do I address unpleasant mildew or musty odors trapped inside antique drawers?
Musty odors in vintage furniture stem from mold spores and bacterial growth trapped in unsealed wood interiors. Remove all drawers and clean every interior surface with a fifty-fifty mixture of distilled white vinegar and water, followed by complete drying in dry outdoor sunlight for several hours. If the smell persists, seal the raw interior wood surfaces with a thin coat of dewaxed shellac. Shellac acts as an impermeable barrier that permanently locks odors and tannins inside the wood cells.
What is the best method to repair a loose chair spindle that keeps falling out?
Loose chair spindles occur when wooden tenons shrink over decades of low humidity, leaving the glue joint empty. Remove the spindle, scrape away all remaining dried glue, and inspect the tenon fit. If the gap is wide, wrap the tenon in a small strip of cotton cheesecloth soaked in wood glue, or use a specialized wood-swelling adhesive that chemically expands the wood cells upon curing. Reinsert the spindle into the socket, clamp the assembly firmly, and allow twenty-four hours for full curing.
Why does wood stain sometimes appear blotchy on restored pieces, and how can it be prevented?
Blotchiness occurs because timber density is rarely uniform; open earlywood pores absorb heavy amounts of liquid pigment, while dense latewood cells resist it, producing an uneven, blotchy appearance. This is especially prevalent on softwoods and woods like cherry, maple, and pine. To prevent this, apply a dedicated pre-stain wood conditioner or a wash-coat of one-pound-cut dewaxed shellac before staining. This partially seals the most porous cells, ensuring that subsequent stain applications absorb uniformly across the entire surface.
Can I use modern spray-can aerosol finishes and still achieve professional-grade results?
High-quality modern aerosol cans containing nitrocellulose lacquer, shellac, or pre-catalyzed lacquer can deliver exceptional, professional-grade results on small to medium-sized furnishings. The key to aerosol application is temperature and distance control. Warm the aerosol can in a bowl of lukewarm tap water for ten minutes before use to increase internal can pressure and promote fine atomization. Spray light, overlapping passes held roughly eight to ten inches away from the surface to prevent runs, sags, and orange-peel texture.