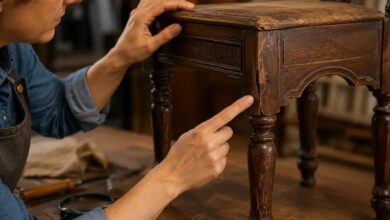

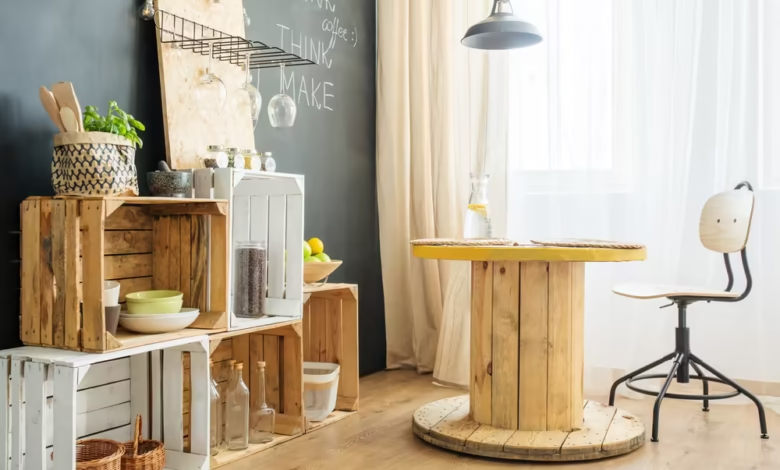
Mass-manufactured home furnishings often lack soul. Walking through a contemporary showroom reveals endless rows of identical pressed-wood tables, neutral fabric sofas, and generic shelving units designed for convenience rather than longevity. While modern flat-pack items serve a functional purpose, they rarely tell a story or infuse a room with genuine personality. This aesthetic monotony has fueled a massive resurgence in furniture upcycling, the creative practice of taking discarded, worn, or outdated furnishings and transforming them into functional pieces of art.
Upcycling moves far beyond simply applying a quick coat of white paint over an old tabletop. True upcycling reimagines the core utility, silhouette, and tactile finish of an object. A scratched mid-century dresser becomes a luxury bathroom vanity; an orphaned dining chair transforms into an entryway statement shelf; an obsolete media cabinet finds second life as a speakeasy-inspired dry bar. Engaging in creative upcycling allows homeowners to curate bespoke, high-end interiors while diverting quality hardwoods and vintage metals from municipal landfills.
The Aesthetic and Practical Value of Upcycling
Before exploring specific project ideas, one must understand why vintage and pre-owned pieces make superior foundations for home decor. Furnishings built prior to the late twentieth century frequently boast construction standards that modern budget retailers simply cannot match. Solid oak frames, quartersawn walnut veneers, hand-cut dovetail drawer joints, and mortise-and-tenon structural supports provide an enduring skeletal base that modern particleboard cannot rival.
Furthermore, upcycling addresses the environmental toll of throwaway culture. Discarded furniture represents millions of tons of solid municipal waste annually, much of which contains synthetic adhesives, plastic laminates, and formaldehyde resins that do not biodegrade. Rescuing an old dresser from a curb or thrift outlet keeps those resources active within the circular economy.
Financially, upcycling provides access to high-end design aesthetics at a fraction of luxury retail costs. With some basic hand tools, sandpaper, quality paints, and fresh hardware, an outdated twenty-dollar thrift store find can easily mimic a four-figure designer showroom showpiece.
Transforming Outdated Dressers and Credenzas
Old dressers are among the most versatile candidates for upcycling because their boxy geometry and sturdy framework accommodate endless functional modifications.
Converting an Antique Commode into a Powder Room Vanity
One of the most dramatic upcycling projects involves retrofitting a vintage wooden commode or small dresser into a functioning plumbing vanity for a powder room or guest bathroom:
-
Surface Preparation: Remove the original wood top or seal it thoroughly with marine-grade spar urethane to resist standing water. Alternatively, replace the wood top with a custom-cut marble or quartz remnant sourced from a local stone fabricator.
-
Plumbing Alterations: Cut out the interior center sections of the upper drawers to create a U-shaped channel that clears the sink drain pipe and water supply lines, preserving the exterior drawer fronts so they still appear fully functional.
-
Sink Installation: Mount a drop-in vessel sink on top of the cabinet to preserve maximum interior drawer space, or cut an oval basin cutout into the top for an undermount porcelain bowl.
-
Finishing Touches: Install high-arc brass faucets and modern geometric drawer pulls to establish an intentional contrast between vintage woodwork and sleek modern plumbing fixtures.
Building a Fluted Mid-Century Credenza
Bulky nineteen-eighties entertainment units and plain laminate credenzas can be completely modernized using fluted wood tambour or half-round dowels:
-
Cut half-round pine or oak moulding dowels to match the exact vertical height of the cabinet doors.
-
Secure the wooden dowels edge-to-edge across the front of each door using heavy-duty construction adhesive and fine pin nails.
-
Apply a deep walnut or ebony gel stain across the textured surface, highlighting the dimensional ridges and shadows.
-
Swap out original squat wooden legs for tall, matte-black tapered steel hairpin legs to lift the entire piece off the floor, instantly lending it an airy, architectural profile.
Reimagining Chairs, Stools, and Benches
Individual dining chairs and small side tables often end up separated from their original sets, making them inexpensive acquisitions at yard sales and clearance auctions. Rather than discarding them as mismatched clutter, these pieces can be repurposed into unique accents.
Wall-Mounted Chair Back Coat Racks
Chairs with broken legs or cracked bottom seats do not belong in the trash. The carved wooden backs of spindle-back, ladder-back, or bentwood chairs can be salvaged into wall-mounted coat racks:
-
Saw the chair back off cleanly right above the seat joint using a Japanese pull saw or fine-tooth handsaw.
-
Sand down the cut ends flush, ensuring no splinters or jagged edges remain.
-
Mount three to four heavy cast-iron coat hooks along the bottom cross-rail of the chair back.
-
Affix heavy-duty flush-mount keyhole hangers to the rear uprights and secure the assembly directly into wall studs in your entryway.
-
The top rail functions as a coat, hat, and umbrella rack, while the open vertical spindles can be used to hold scarves or tucked mail.
Converting a Twin Headboard into an Outdoor Garden Bench
A vintage wooden or wrought-iron twin-size headboard and footboard set can be combined to create a charming cottage-style bench for a porch or garden patio:
-
Use the taller headboard as the backrest of the bench.
-
Cut the matching footboard down the center into two identical halves, mounting each half perpendicularly to the headboard to serve as side armrests and front legs.
-
Construct a simple rectangular seat frame out of rot-resistant cedar or treated two-by-fours, securing it between the armrests with pocket screws.
-
Lay smooth cedar slats across the seat frame, sand all surfaces smooth, and coat the completed structure in exterior-grade milk paint followed by an outdoor protective sealant.
Turning Obsolete Cabinets into Statement Bars
Massive armoires, china hutches, and television cabinets designed for deep cathode-ray tube televisions are widely available because modern flat-screen televisions no longer fit inside them. These pieces possess cavernous storage volumes that make them ideal for conversion into dedicated home dry bars.
Begin by removing outdated interior structural dividers, such as fixed media shelves or glass display partitions. Paint the exterior cabinet in a moody, saturated hue like midnight navy, deep hunter green, or charcoal gray to give the piece visual weight.
Inside the cabinet, incorporate surprising, luxurious details:
-
Reflective Backing: Line the interior rear wall with peel-and-stick antiqued mirror tiles or high-contrast botanical wallpaper to create visual depth when the cabinet doors are open.
-
Under-Cabinet Stemware Racks: Mount slatted wooden or metal hanging tracks underneath the top interior shelf to slide wine and cocktail glasses upside down.
-
Integrated Accent Lighting: Install battery-operated or hardwired warm-white light-emitting diode strip lights along the interior door frames, connecting them to magnetic sensors so the lights automatically turn on when the cabinet doors open.
-
Work Surface Preservation: Line the primary prep shelf with a sheet of cut tempered glass or self-adhesive butcher block veneer to protect the wood from acidic lemon juices, sticky liqueurs, and spilled liquids.
Upcycling Table Surfaces with Artistic Textures
Standard coffee tables, plant stands, and desks with scratched or water-damaged surfaces can be completely reimagined through inventive surface resurfacing techniques rather than plain paint coats.
Poured Concrete Tabletop Overlay
For an industrial, urban-loft design aesthetic, apply a skim coat of feathered micro-topping concrete directly over an existing laminate or timber tabletop:
-
Scuff the existing tabletop aggressively using sixty-grit sandpaper to create physical grip for the overlay.
-
Spread two to three thin coats of acrylic-fortified micro-cement across the surface and around the edges using a flexible steel trowel, leaving subtle sweeping textures for an authentic concrete feel.
-
Once cured, hand-sand the concrete with three-hundred-and-twenty-grit paper to achieve a velvety, smooth texture.
-
Seal the porous material with a food-safe, penetrating stone and concrete sealer to prevent coffee and oil stains from penetrating the finish.
Mosaic and Tiled Surface Inlays
Small side tables with recessed tops provide the perfect platform for graphic tile work:
-
Select patterned ceramic tiles, porcelain penny rounds, or marble mosaic sheets that match your room color scheme.
-
Affix the tiles to the wooden tabletop using flexible polyurethane tile adhesive, spacing them evenly with plastic spacers.
-
Apply pre-mixed mold-resistant grout across the joints, wiping away excess residue with a damp sponge before it dries.
-
Finish the surrounding wooden edges with a dark contrasting stain to frame the vibrant tile layout.
Essential Preparation and Finishing Tips for Success
The difference between a clumsy craft project and an elevated upcycled statement piece comes down entirely to preparation and patience. Professional upcyclers rarely skip the foundational steps that ensure longevity.
Always degrease vintage pieces before sanding. Use a rag dampened with mineral spirits or a mixture of warm water and trisodium phosphate to remove decades of body oils, cooking grease, and silicone-based furniture polishes. If you sand an unwashed piece, your sandpaper will drive surface oils directly into the wood pores, causing modern primers and paints to peel down the line.
Furthermore, invest in specialized primers. When working with vintage hardwoods like mahogany or red oak, natural wood tannins tend to bleed through water-based white paints, creating unsightly pink or yellow stains. Applying a dedicated shellac-based primer seals those tannins permanently behind an impermeable barrier, guaranteeing that your final topcoat stays crisp, true, and durable for years of daily use.
Frequently Asked Questions
What type of paint provides the best durability for high-touch upcycled furniture?
For high-use pieces like dining chairs, desk surfaces, and dressers, cabinet-grade enamel paints or water-borne alkyd paints offer superior durability. These paints level out smoothly as they dry, leaving virtually no brush strokes, and cure into an exceptionally hard, scratch-resistant enamel shell that resists chipping without needing a separate clear topcoat. Chalk paints and milk paints are excellent for decorative, distressed, or matte looks, but they require a sealing layer of furniture wax or clear polycrylic to resist water and hand oils.
How do you prevent paint from peeling off slick laminate or melamine surfaces?
Painting slick plastic laminate requires mechanical abrasion and a chemical bonding primer. Thoroughly sand the entire laminate surface with one-hundred-and-twenty-grit sandpaper to break the high-gloss sheen and create microscopic scratches. Clean away all dust using a tack cloth, then apply a coat of extreme-adhesion bonding primer designed specifically for plastics and glass. Allow the bonding primer to cure fully for twenty-four hours before applying your primary decorative paint coats.
Can you safely remove old, rusted hardware without damaging antique wood?
To remove stubborn, rusted screws without stripping the wood or breaking the metal head, apply a few drops of penetrating oil directly around the screw threads and allow it to sit for twenty minutes. If the screw remains stuck, place a standard manual screwdriver firmly into the screw slot and tap the rear handle of the screwdriver gently with a small hammer; the shockwave helps break the bond of the rusted threads. Alternatively, applying heat to the screw head using the tip of a household soldering iron expands the metal slightly, loosening the grip on the surrounding wood fibers.
How can I make modern replacement hardware fit holes drilled for vintage pulls?
Vintage dressers frequently feature unusual hardware center-to-center hole measurements, such as three-and-a-half or four-and-a-quarter inches, which do not match modern standard three-inch or four-inch drawer pulls. You can resolve this by filling the existing holes with two-part wood filler or wooden dowel plugs hammered in with wood glue. Once cured, sand the surface flush, paint or stain the drawer front, and drill brand-new holes matched precisely to the specifications of your new hardware. Alternatively, use modern backplate pulls, which feature wide metal plates that cover the old holes completely.
Is it safe to upcycle furniture painted before nineteen-seventy-eight?
Furnishings manufactured in the United States prior to nineteen-seventy-eight may contain hazardous lead-based paints. Before dry sanding or scraping any vintage piece with unknown historical coatings, test the surface using an inexpensive chemical lead check swab available at hardware stores. If lead paint is detected, do not sand the piece, as this produces toxic, airborne dust. Instead, strip the paint using a non-toxic, chemical paste stripper that traps the paint residue in wet sludge, wearing an appropriate particulate and vapor respirator throughout the entire process.
What is the best way to clean and restore tarnished vintage brass drawer pulls?
Avoid using harsh power wire wheels, which can permanently scratch soft brass or strip away valuable historical electroplating. Soak original hardware in a warm bath of water and mild dish soap for an hour to loosen caked grime, then scrub gently with a soft-bristled toothbrush. To remove deep oxidation, rub the brass with a paste made from equal parts baking soda and lemon juice, or use a specialized paste metal cleaner. Rinse with clean water, dry thoroughly with a microfiber towel, and apply a light coat of carnauba wax to prevent rapid re-tarnishing.